Develop with VS Code Remote – Containers
Visual Studio Code is a powerful text editor which can be expanded to a full featured integrated development environment (IDE) with plugins. With the Visual Studio Code Remote - Containers extension you can use prebuilt Docker container as the runtime environment for your code development (also called Dev Container). This page serves as an alternative to the Getting Started-section. The following features make this a nice development environment:
- All ogs prerequisites (except of MPI / PETSc support, may come later) already setup, including
uv,ruff,hugo,direnv. - Code editing with auto-completion.
- Easy build configuration by simply selecting CMake presets.
- Start a debugging session with a click of a button.
- Preview the web site or run a Jupyter notebook.
zsh-terminal with sane defaults.- Works also on a remote machine!
Set-up prerequisites
- Install Git as described in the Getting-Started section.
- Clone the OGS source code as described in the Getting-Started section.
- Install Docker (or have a Docker machine available where you have SSH access).
- Install VS Code.
- Inside VS Code install the Remote Development extension pack (includes Remote – Containers and Remote – SSH extensions).
Open OGS source code inside the development container
- Open VS Code.
- Open the OGS source code folder.
- Press
F1and typereopen in [container], pressENTER.
This takes now some time as the container is downloaded from the registry. Once finished you should see the following in the bottom status bar:
ogs-gcc-dev.
Example use cases
Debug ogs
As an example use case we configure, build and debug the ogs executable.
CMake configuration is handled by using CMake presets which can be selected from the bottom status bar in VS Code. See the Configure and build with CMake Presets in Visual Studio Code for details.
In the editor:
- Open
ogs.cpp - Set a breakpoint in the first line of the
main()-function (around line 58) by clicking on the left gutter in the editor window (a red dot marks the enabled breakpoint).
In the CMake sidebar:
- Under
ConfigureSelect thedebugpreset: Hover over the current preset, then click the pen icon. A drop-down list appears where you can select the preset. Alternatively you can open the command palette and invoke the CMake: Select Configure Preset command. - Click the
Buildbutton (also available in the status bar at the bottom). - Under
Debugselect theogstarget. - Click the bug icon.
After some seconds the status bar color changes orange to indicate an active debugging session:
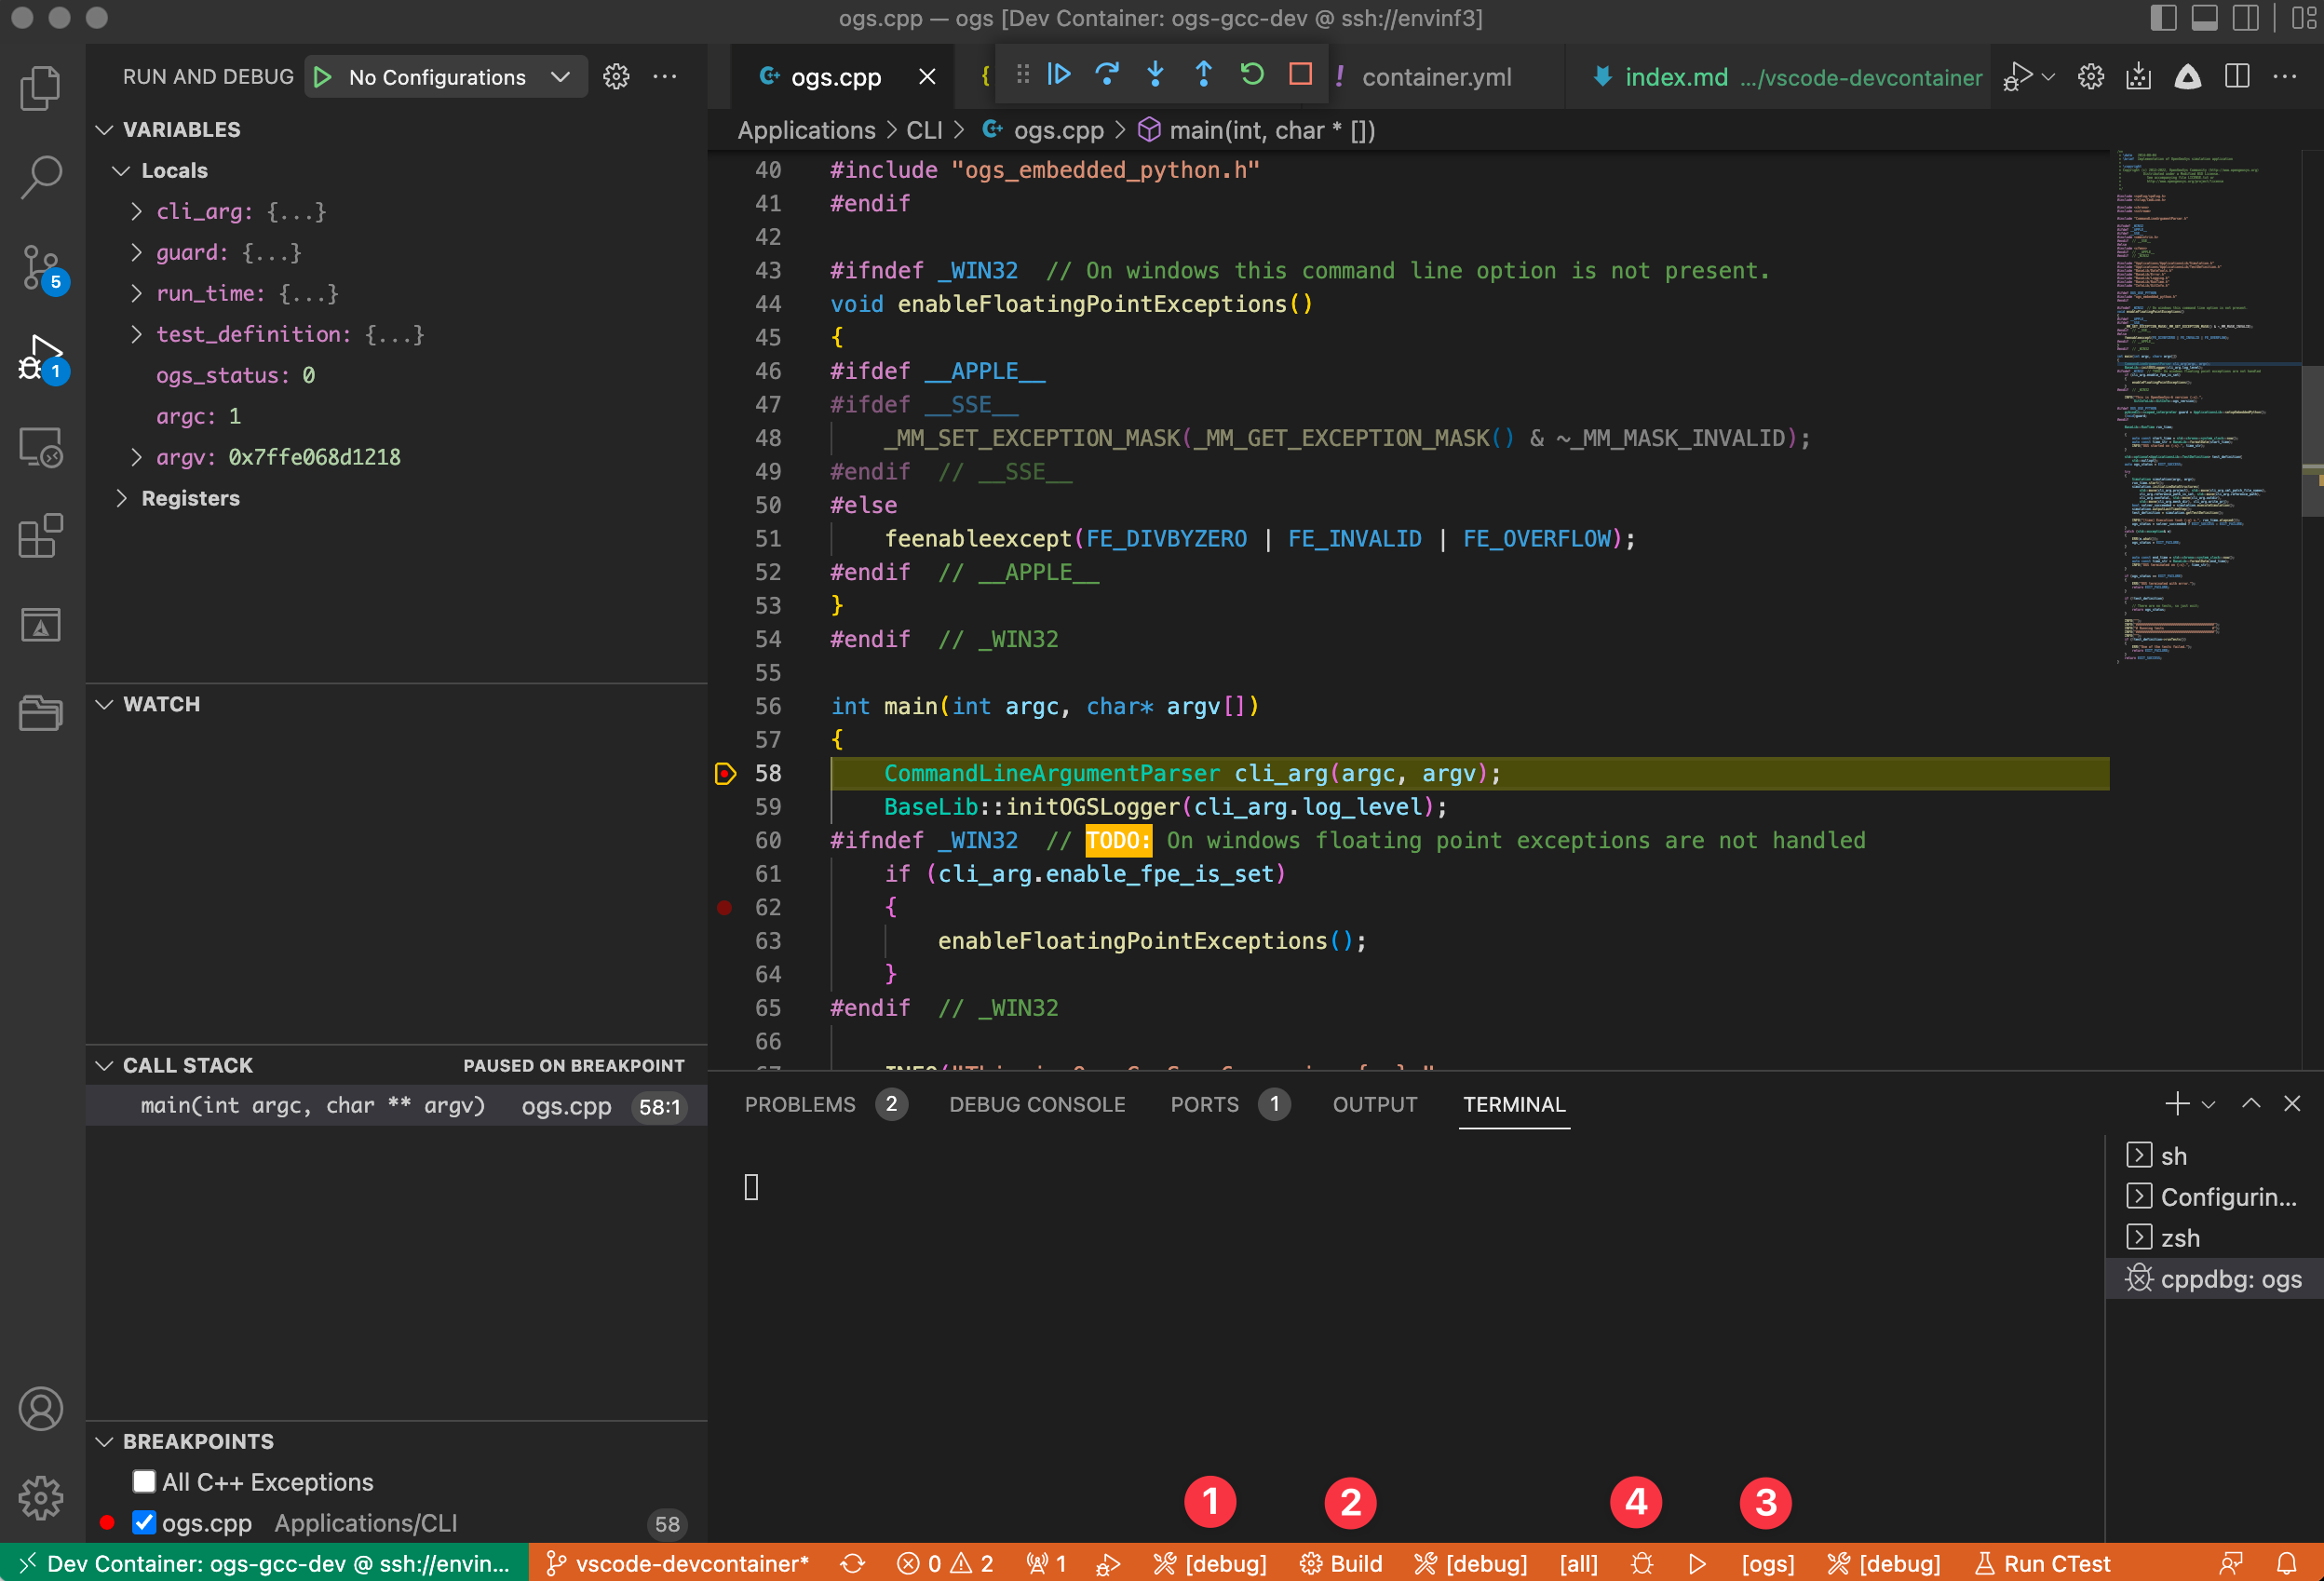
ogs.cpp. Step over lines with the Debug toolbar buttons on top. See local variables on the left.
Run Jupyter Lab
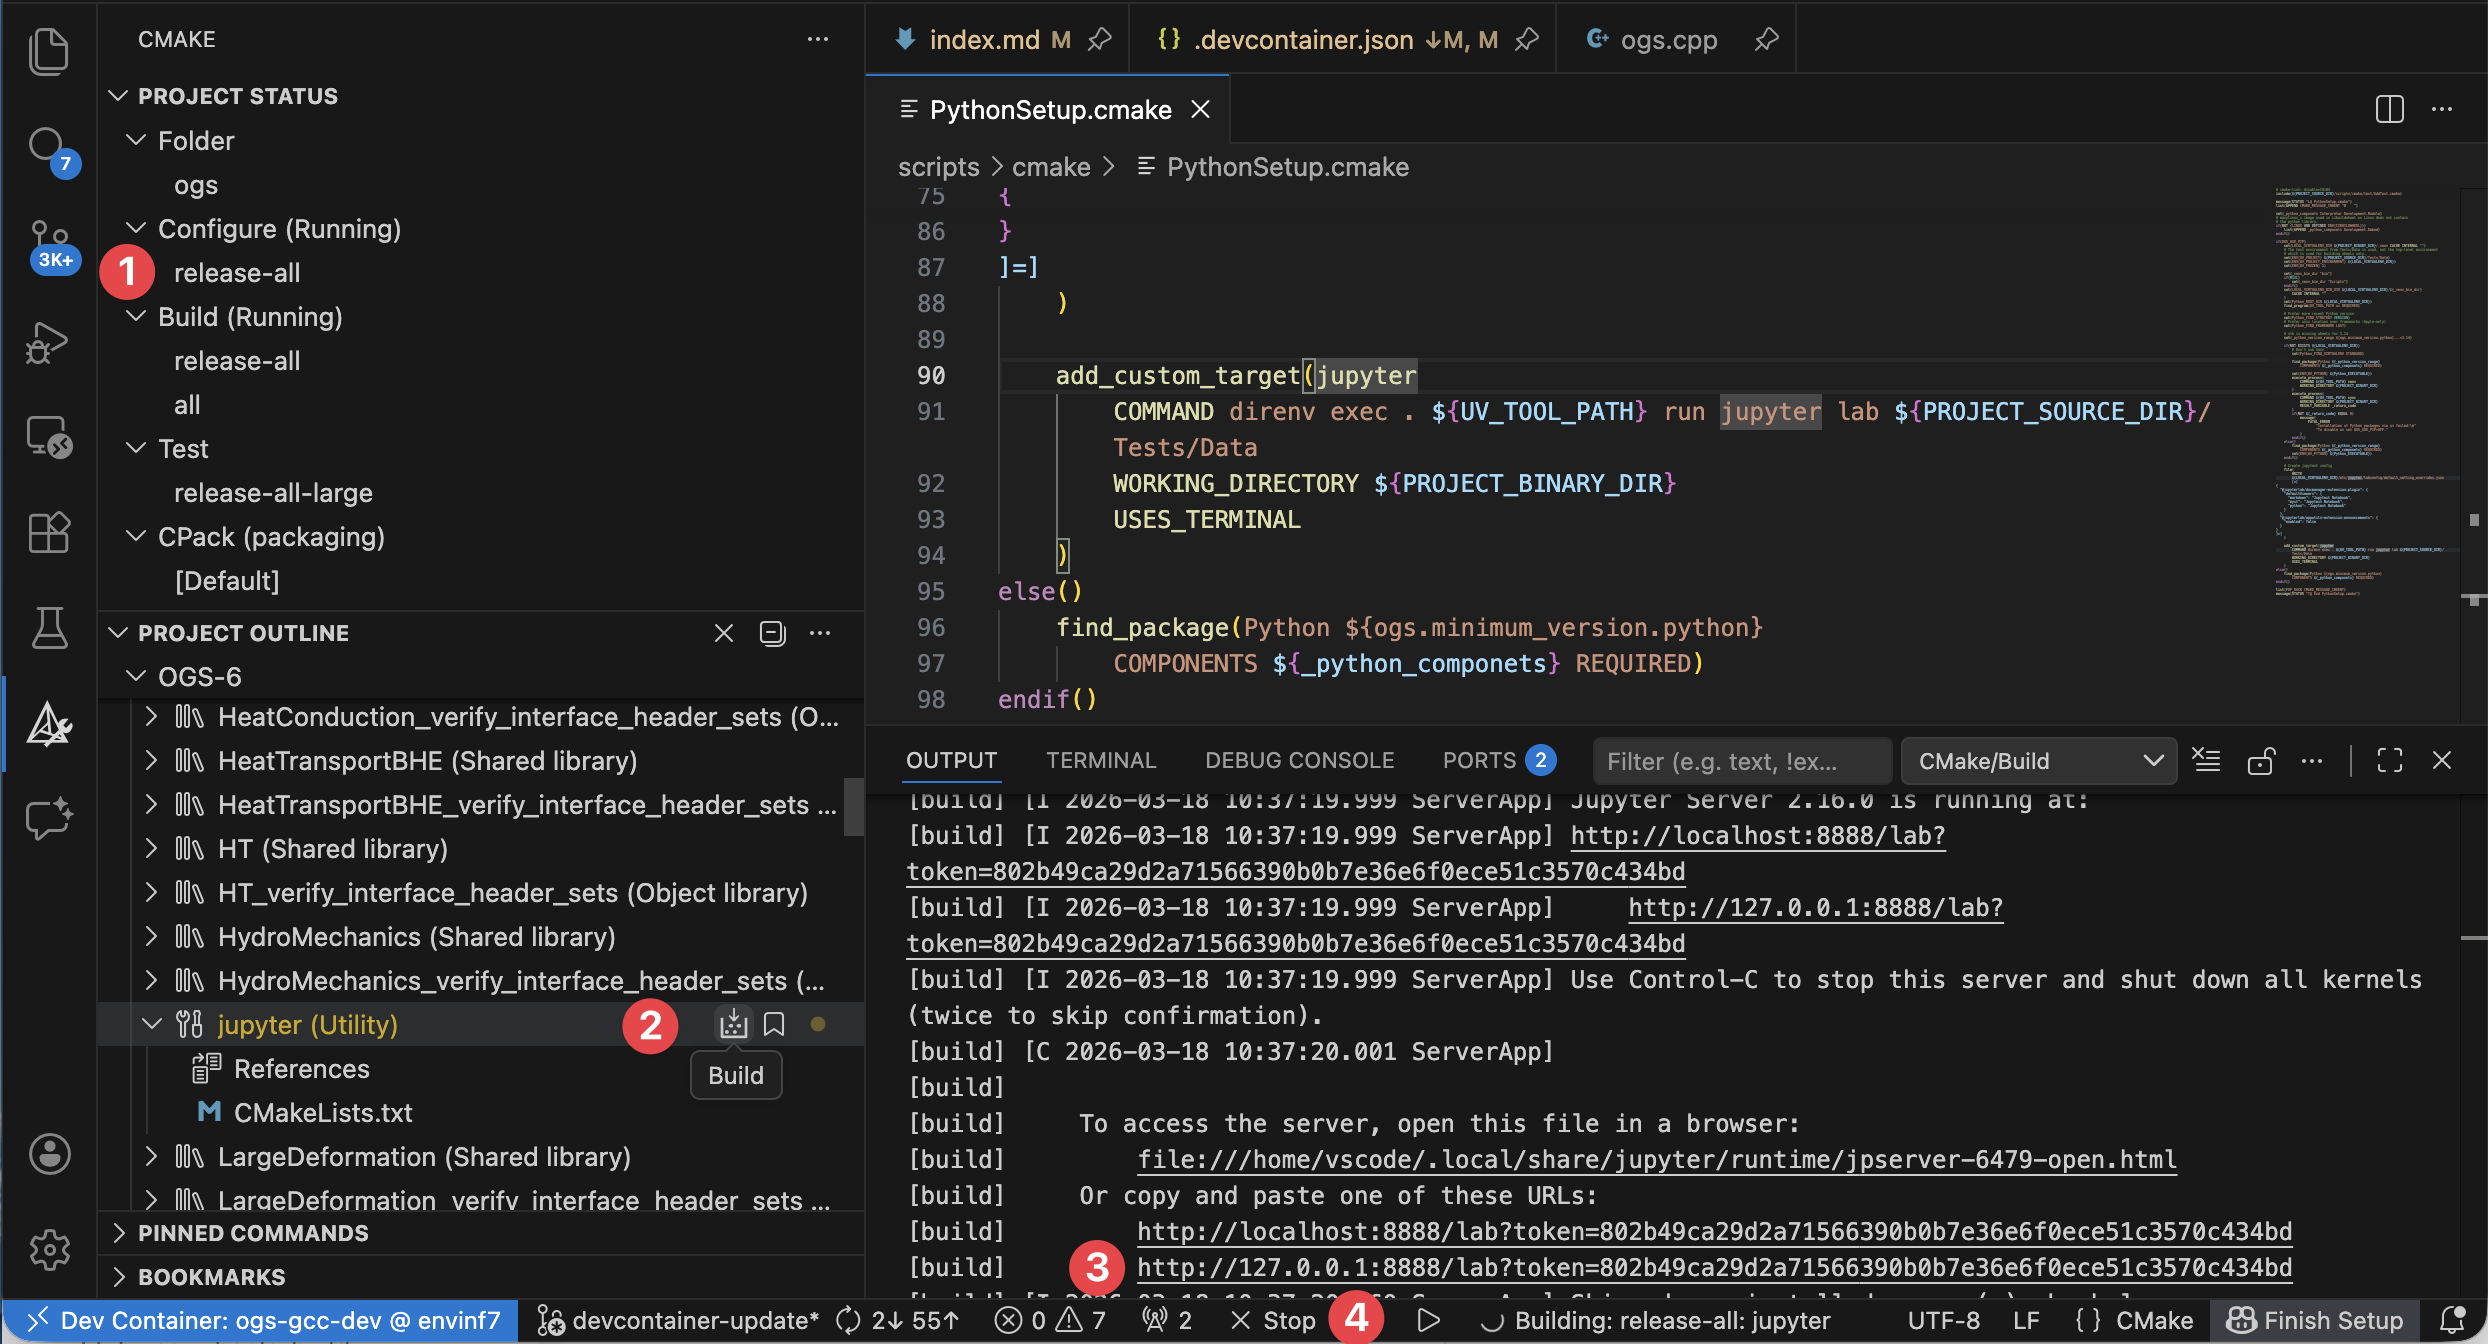
In the build directory (make sure to have OGS_USE_PIP=ON or use the release-all CMake preset) build the jupyter-target or graphically:
- Make sure to have configured with
OGS_USE_PIP=ON, e.g. by usingrelease-allpreset. - Build the
jupyter-target in the Project Outline. - Control-click the printed URL in the Output window.
- When done, stop the Jupyter server by cancelling the build.
ogs.cpp. Step over lines with the Debug toolbar buttons on top. See local variables on the left.
Run the web preview
In the build directory build the preview-web-target. You can build it graphically as described for Jupyter Lab above.
Use a remote machine
All of this works also via ssh. If you do not have Docker locally running but some server with Docker where you have ssh access to you can do the following:
- Open VS Code.
- Click the green button on the bottom left.
- Press
ENTER(Connect to host). - Choose the server.
- [Now you are in a Remote – SSH-session.]
- Open the OGS source code folder (you have to clone it before on that server).
- Press
F1and typereopen in [container], pressENTER.
Links
- Enabled
gitaliases
This article was written by Lars Bilke. If you are missing something or you find an error please let us know.
Generated with Hugo 0.150.1
in CI job 743172
|
Last revision: February 5, 2026
Commit: [py,cmake] Allow Python 3.14. 4d949dd99c
| Edit this page on